



How to Configure TDE Auto Login Wallet in Oracle 19c
In this post, we will discuss about enabling Transparent Data Encryption – TDE in Oracle 19c.
To configure Auto Login Wallet in Oracle 19c there are few parameters which needs to be set in spfile/pfile.
Step 1
Create Wallet folder in ASM
If necessary, create a wallet directory. Typically, wallet directory is located in `ASM or $ORACLE_BASE/admin/db_unique_name/wallet.`
Ideally wallet directory should be empty.
`./grid.env — asm file system environment file env`
`asmcmd`
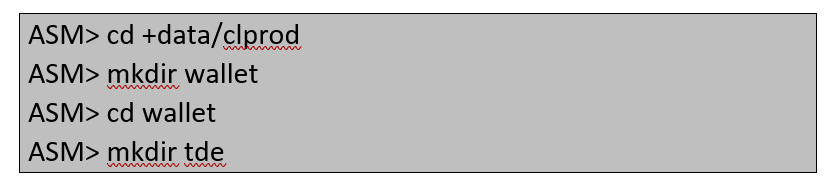
Step 2
Update wallet details in the parameter file.
You must configure Keystore location and type by setting WALLET_ROOT and TDE_CONFIGURATION parameters in pfile or spfile.
`. ./clprod.env`
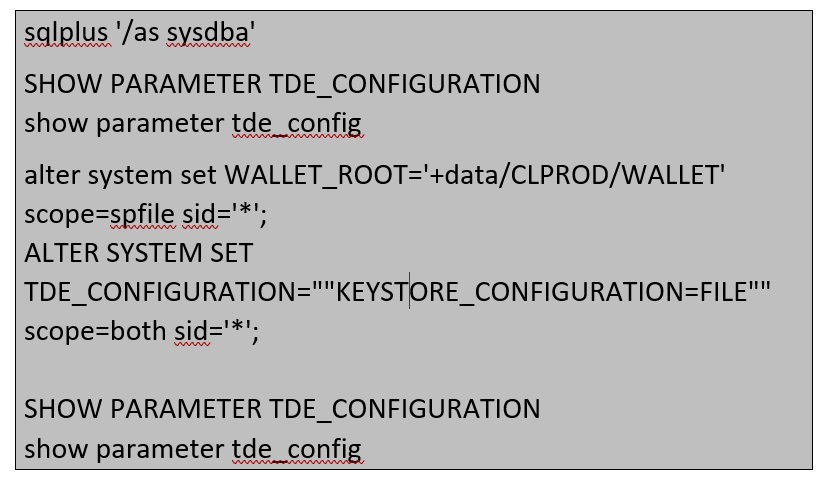
Step 3. Restart the Database
Source the container database environment
`. clprod.env`
`sqlplus ‘/as sysdba’`
`show con_name;`
`CON_NAME`
——————————
CDB$ROOT
CLPROD> shut immediate
Database closed.
Database dismounted.
ORACLE instance shut down.
CLPROD> startup
ORACLE instance started.
Total System Global Area 16106127360 bytes
Fixed Size 35621984 bytes
Variable Size 1017607903 bytes
Database Buffers 534432665431 bytes
Redo Buffers 9817655 bytes
Database mounted.
Database opened.
or if RAC
`srvctl status database -d CLPROD`
`srvctl stop database -d CLPROD`
`srvctl start database -d CLPROD`
Step 4.Check the status of the wallet
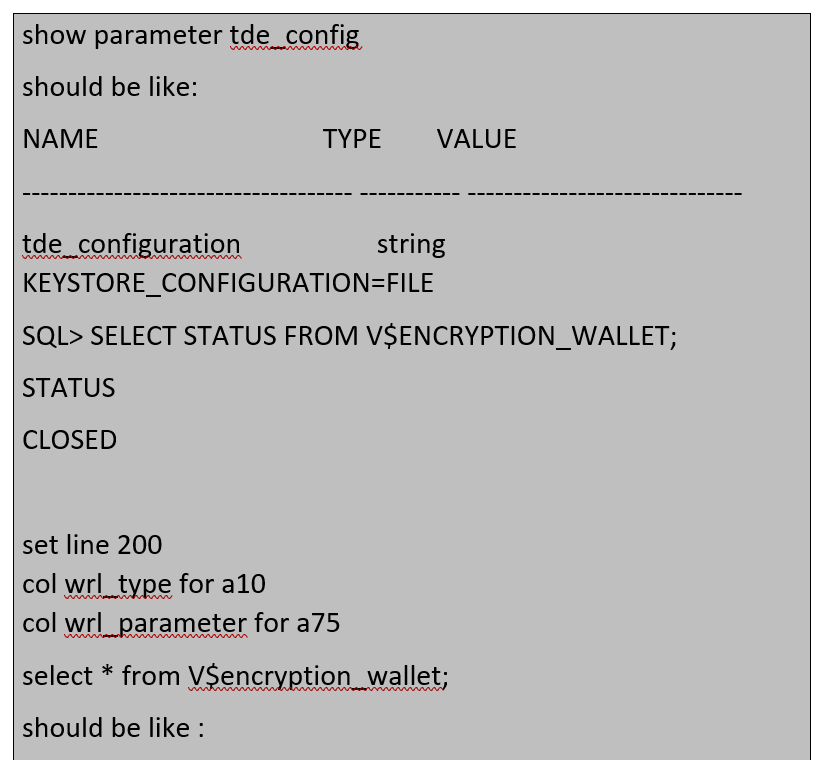
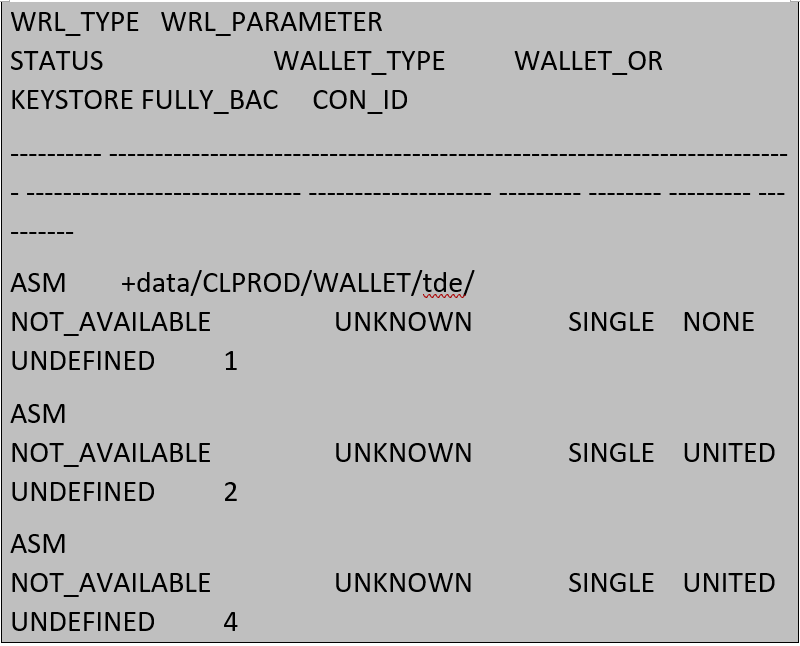
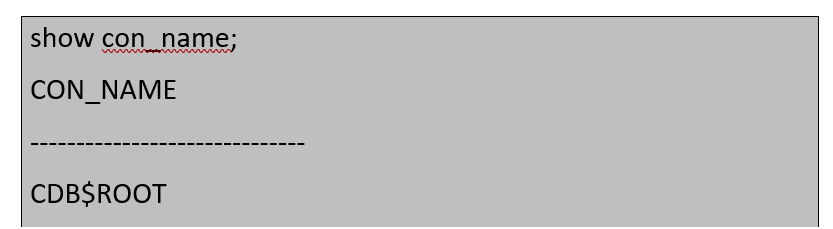
Step 5. Create KEYSTORE for container
Source the container database environment
`. clprod.env`
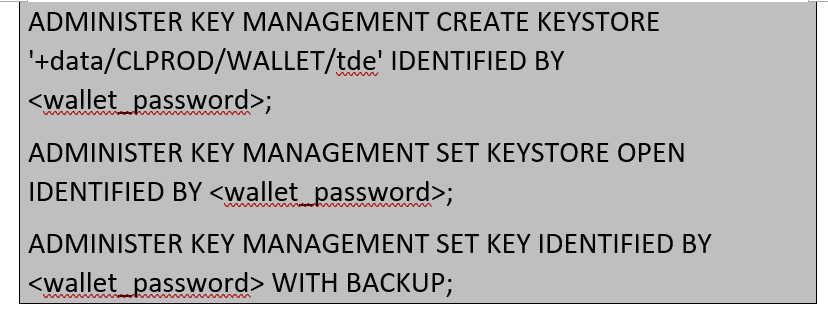
Source the container database environment
`. clprod.env`
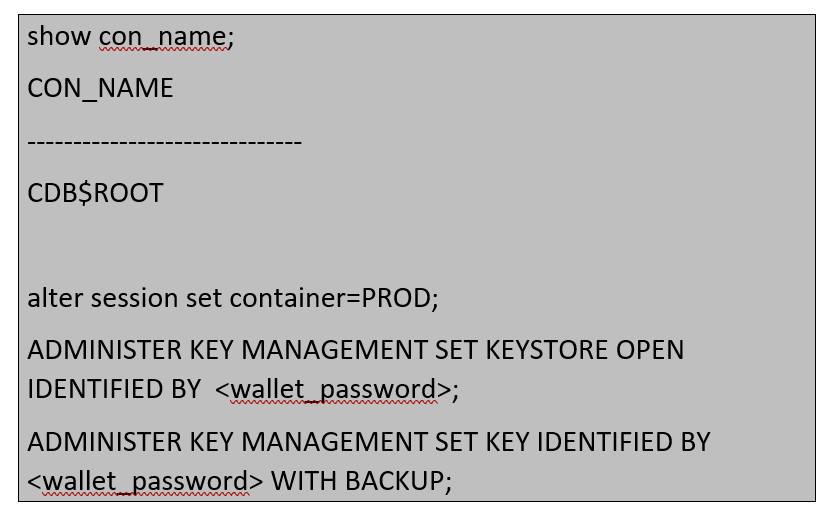
Step 7. Create an Auto-Login or a Local Auto-Login Software Keystore
Source the container database environment
`. clprod.env`
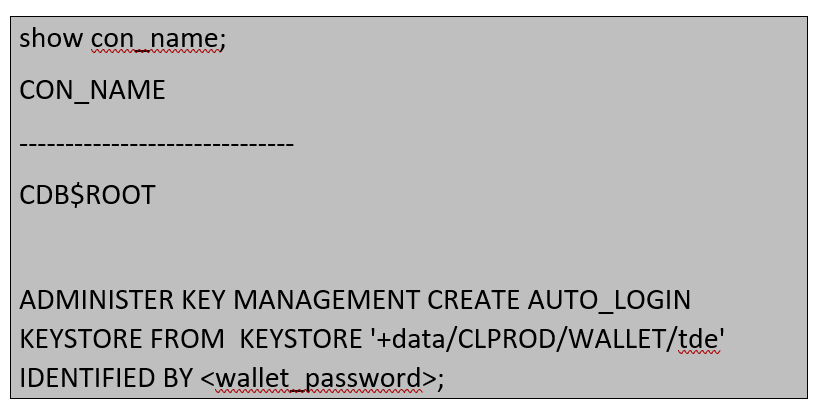
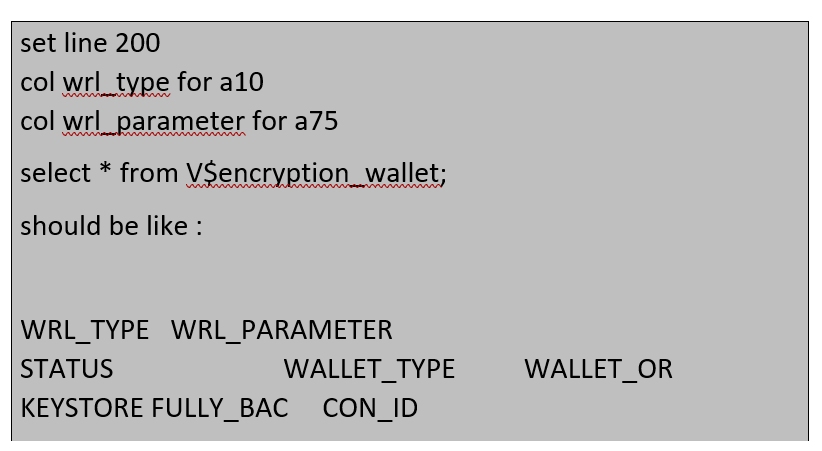
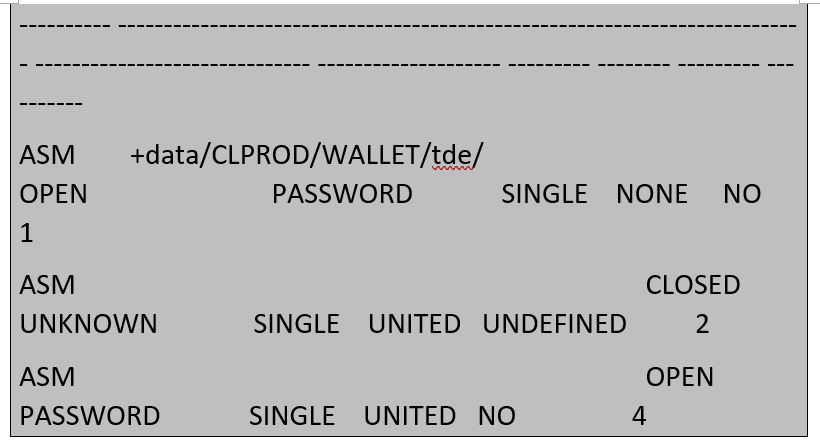
Step 8. Restart the Database `sqlplus ‘/as sysdba’
`CLPROD> shut immediate`
Database closed.
Database dismounted.
ORACLE instance shut down.
CLPROD> startup
ORACLE instance started.
Total System Global Area 16106127360 bytes
Fixed Size 35621984 bytes
Variable Size 1017607903 bytes
Database Buffers 534432665431 bytes
Redo Buffers 9817655 bytes
Database mounted.
Database opened.
or if RAC
`srvctl status database -d CLPROD`
`srvctl stop database -d CLPROD`
`srvctl start database -d CLPROD`
Step 9. Verify autologin
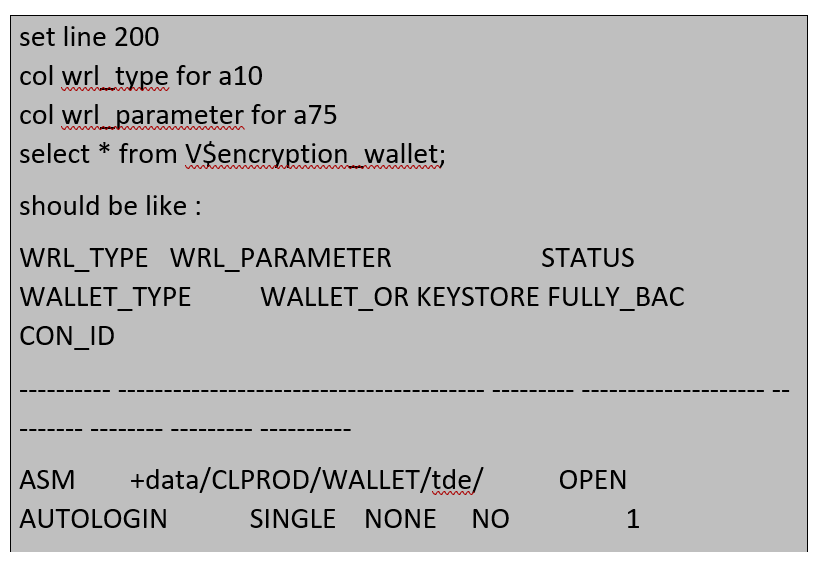
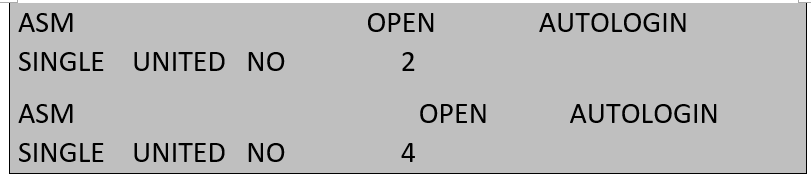
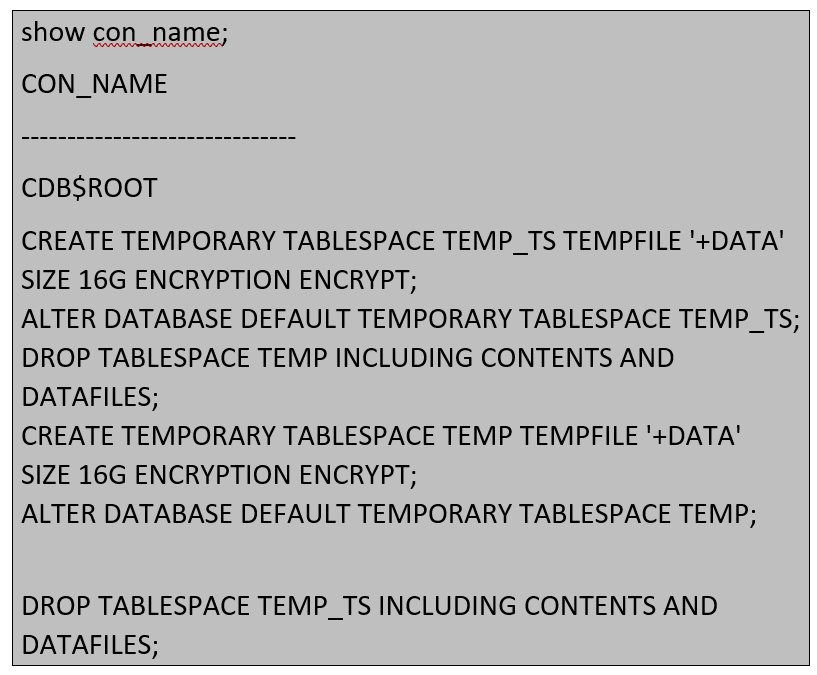
Step 10. Recreate temp tspace in cdb
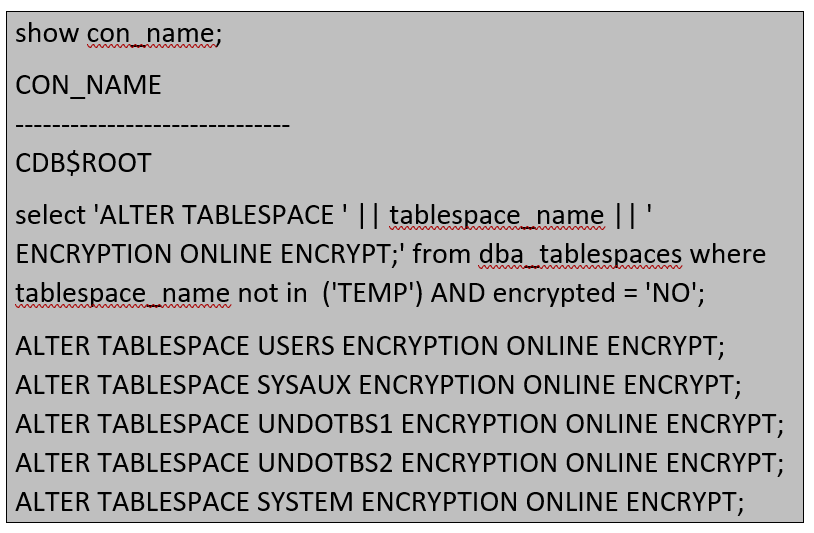
Step 11. Enable TDE for all container tablespaces
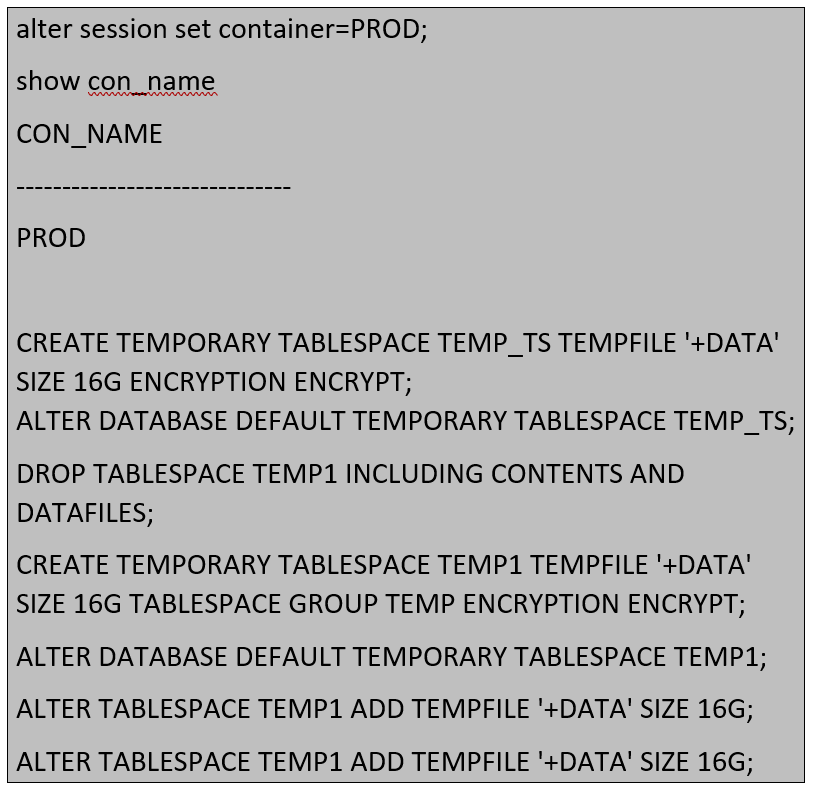
Step 12. Drop and recreate temp tspace for the pdb (prod)
Step 13. Restart the application services.
Step 14. Start Tablespace encryption
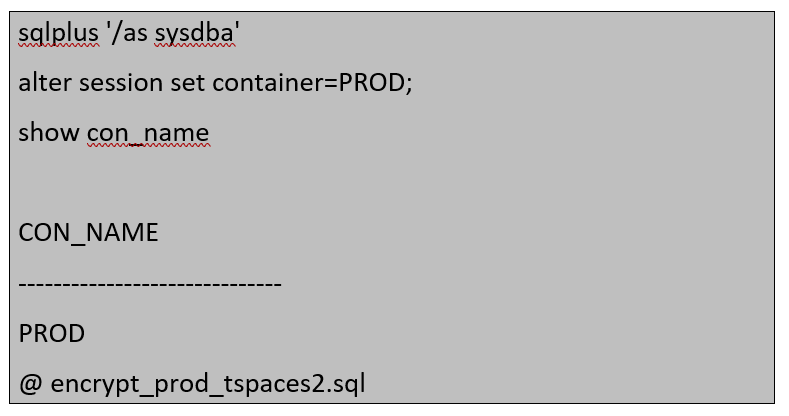
a) Run the following command on VNC as terminal no.1
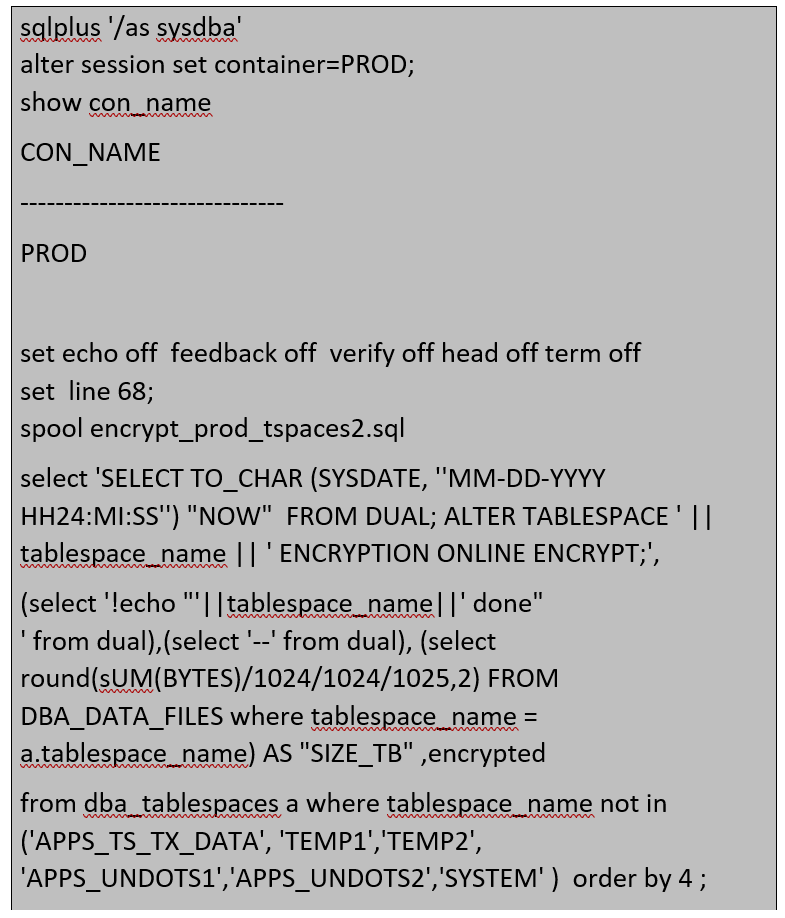
b) Run the following command on VNC as terminal no.2
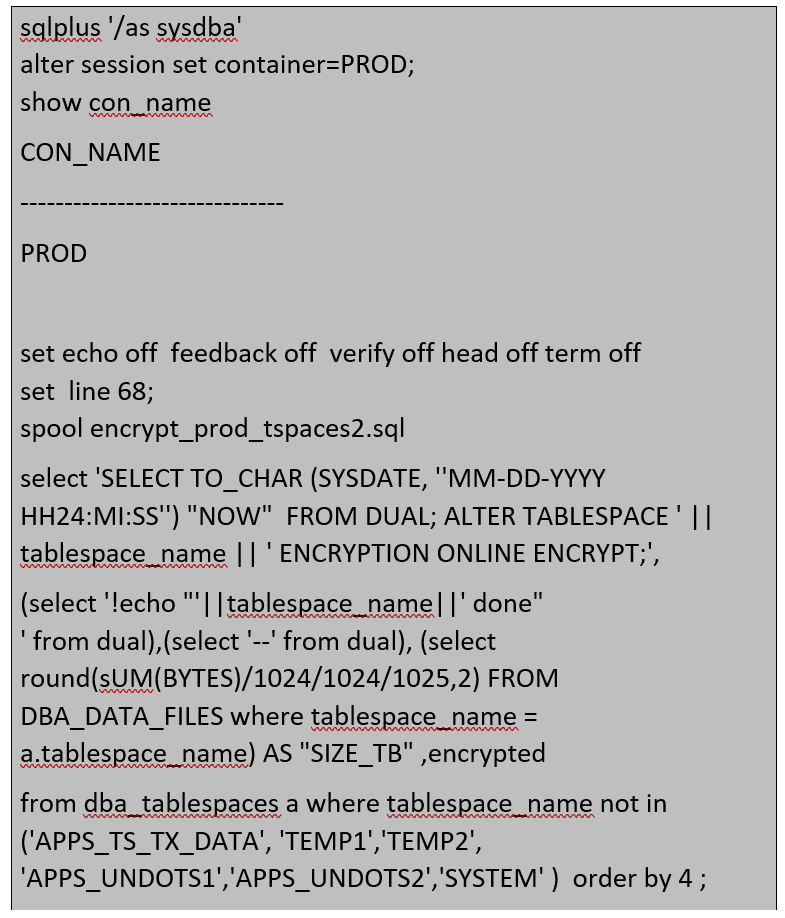

Update/edit the encrypt_prod_tspaces2.sql and run it to start the encryption for other tablespaces.
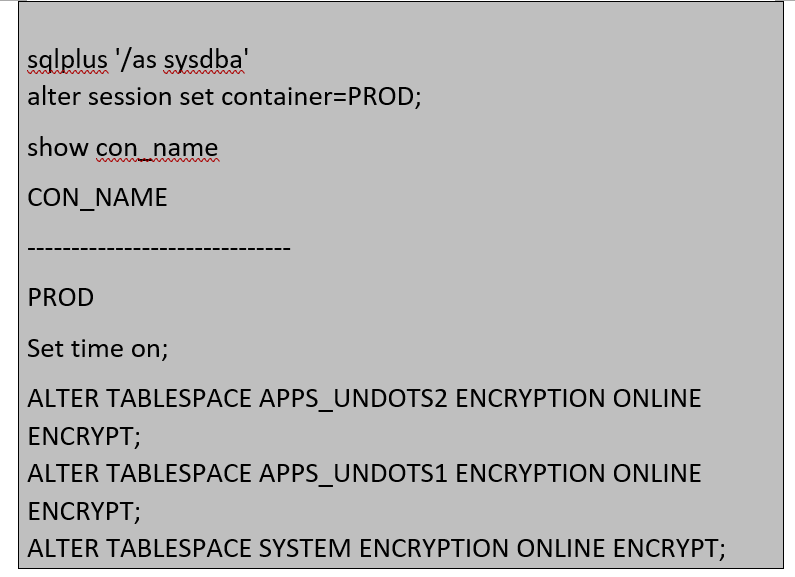
Complete the APPSUNDO tablespaces & system tspace at the end individually.
Make sure this is done only after all the other tablespaces are encrypted completely
Incase if the encryption process errors are out you need to restart the encryption process by using the following command.
To restart a failed encryption:

Conclusion
Security
After the data is encrypted, it is transparently decrypted for authorized users or applications when accessed. TDE helps protect data stored on media (also called data at rest) if the storage media or data file is stolen.
Data is safe (some tools don’t encrypt by default).
Whole database encryption also hides SYSTEM, SYSAUX, TEMP and UNDO data.
You don’t need OMF anymore if you use tablespace online encryption.
Keystore can be closed even SYSTEM, SYAUX and UNDO is encrypted.
Reference: 2586100.1
2559570.1
Explore Related Articles

Design a Connected Healthcare Cloud for Epic, Data and AI
Explore how a connected healthcare cloud can help you bring Epic, data, analytics and AI together while keeping the environment
Read article

Right Workload, Right Place for Regulated Industries
Strategic workload placement helps regulated organizations maintain control, demonstrate resilience and govern AI in production.
Read article

Governing AI Agents Starts With the Infrastructure Beneath Them
Explore the identity, access, policy and operational controls that help organizations deploy AI agents safely across critical infrastructure.
Read article

The Cyberattacks That Never Cross Your Firewall
Discover how Rackspace Managed Digital Risk Monitoring helps identify threats beyond your network, using human-led intelligence to assess risks and
Read article